The Bottom Line
Background
- Requiring little more than a nutrient solution and an aeration pump, a Kratky deep-water-culture system is simple to set up and operate. We went the Kratky route because of its relative simplicity. Though the simplest, we still had plenty to learn before we could count on a predictable outcome.
- Success is wholly dependent on your ability to control the growing environment (food, sun, temperature, ventilation).
Pros
- No dirt, no bending, no shovels required.
- Fast growing: a 30 to 45-day plant cycle is typical for green leafy vegetables.
- Ideal for winter crops in temperate climates.
- Vegetables grown in tanks have a wonderful al-dente crunch not found in plants grown in soil.
- Dry mix recipes can be used instead of liquid nutrients (to save money on operating costs).
- Harvesting is easy and fast; tanks can be cycled quickly.
Cons
- Expensive set-up and operating costs, especially if you use liquid nutrients (tanks, covers, net cups, meters, pumps, air hoses, timers, sunscreens, electric service, more). Operating costs can be reduced (from $.75/unit to $.15/unit by mastering dry mix recipes.
- You need space to set it up.
- Temperate climates may be too hot to operate in summer (increases the water temperature).
- Because it relies on liquid nutrients, hydroponics is not considered organic.
- Each tank takes about 200 gallons of water.
- Unlike garden beds, tanks are easily swamped by heavy rains, and damaged by high winds.
- Must be tended daily; nutrient and pH mistakes can easily wipe out a crop.
- Bug control must be performed without contaminating the tank.
- Wooden tanks wear out in 3 to 4 seasons (even when double lined with plastic and shielded from the elements).
Cost
- About $1K per 4’x16′ tank (200-gallon) if you do the work yourself.
Justification
- The most valuable hydroponic crop is the education received in learning how to produce a dependable source of food. Fast, clean, and easier than growing in soil, the trick is dry-mixing your nutrients.
- We also tested total environment control by running a tank in the garage using grow lights, pumps, and fans on timers; the cost of electricity was immediately prohibitive; the extra heat and humidity stressed our air conditioning system.
First Kratky Hydroponics Test 062515
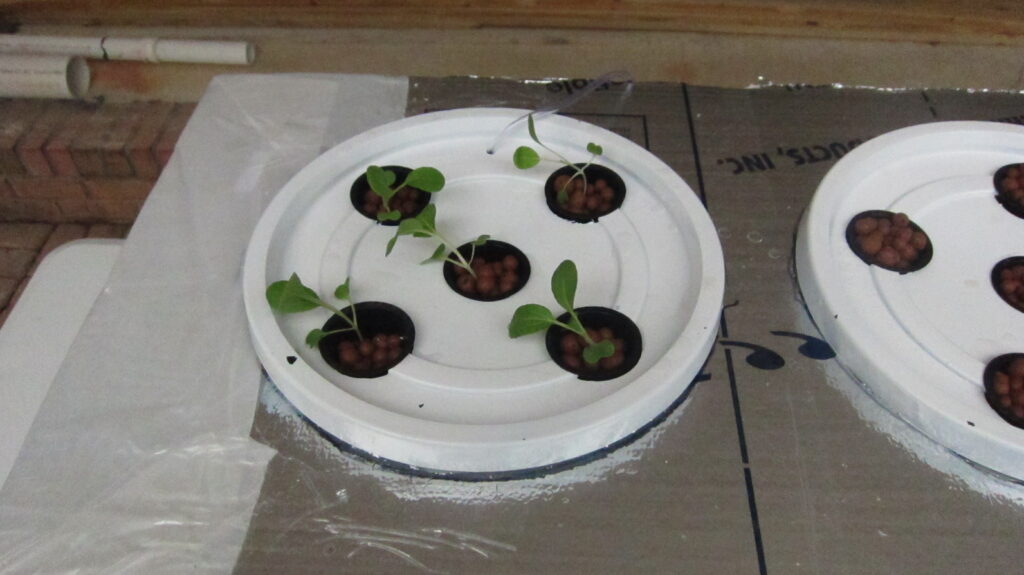
Our first tests of a simple Kratky hydroponic system in 5-gallon buckets ran for two full growing cycles (about 2 months). Kratky systems require little more than water, nutrients, aeration, and the ability to maintain a stable temperature; filled with water and nutrients, the buckets sit in an insulated container that provides a stable temperature. A small aquarium air pump provides aeration.
Kratky Pots Day-31 of Test-1 072515
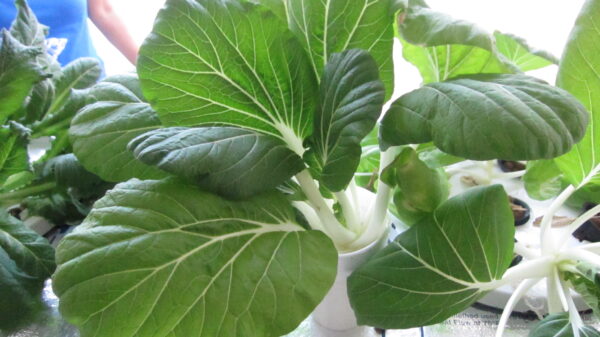

Testing of the Kratky system went well. Based on the results, we decided to scale up to a 4’x8′ tank.
Constructing and Testing Hydro-Tank #1 090715
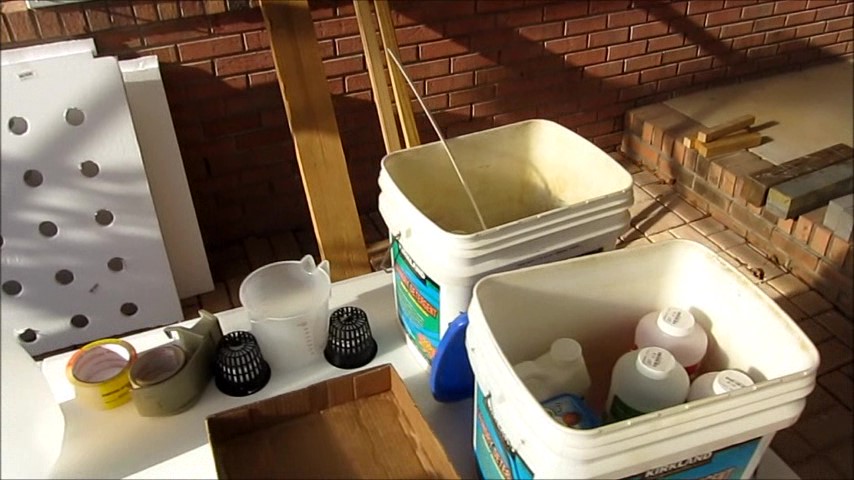
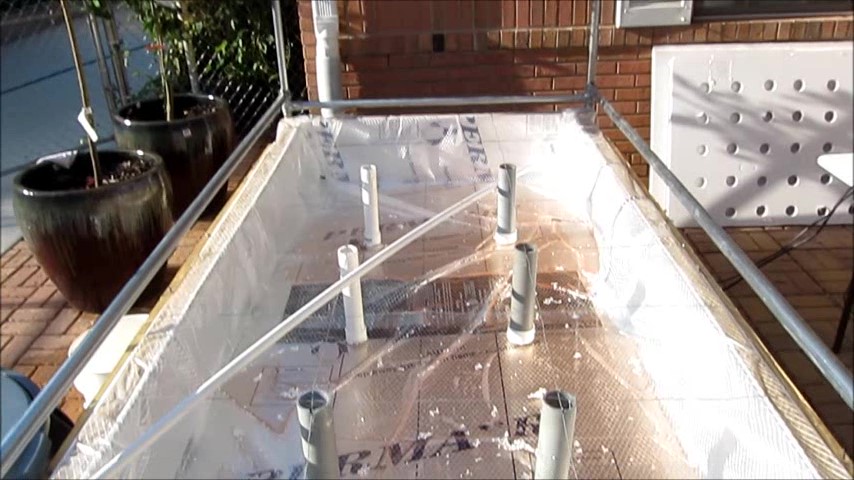
After the Kratky tests, we constructed and tested Hydro Tank #1, shown below.
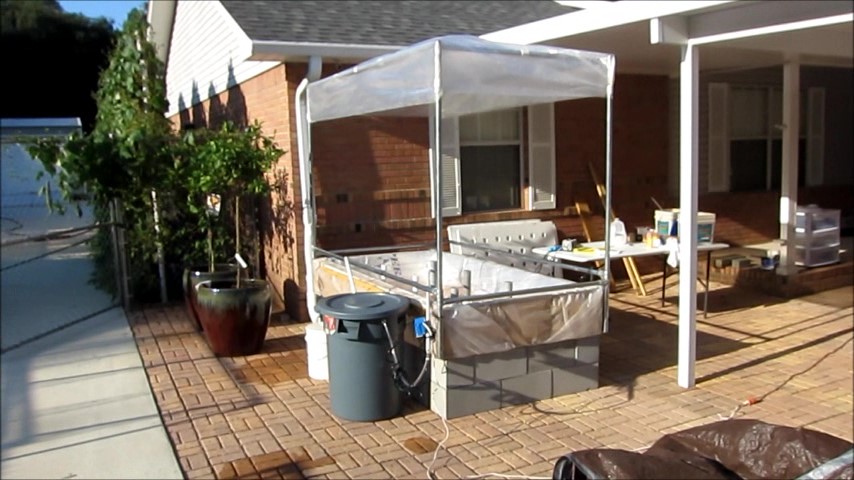
Hydro Tank #1 was cycled for the first time (below) using adhoc processes that would eventually be simplified to reduce the labor required preparing the tank for re-planting.
Hydro Tank #1 Water Change 102815
The original (gen-1) design of our hydroponic tanks is shown below. Note the wire and PVC post raft supports. This 4’x8′ tank was constructed with heavy 2″x12″ walls.
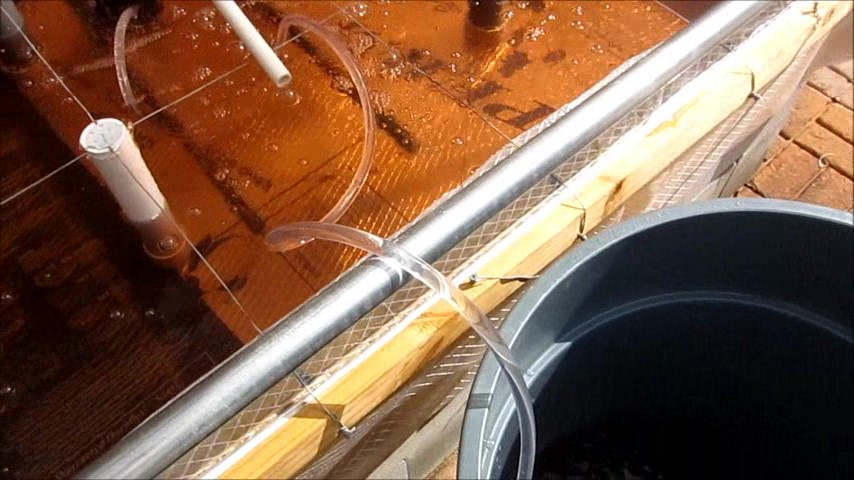
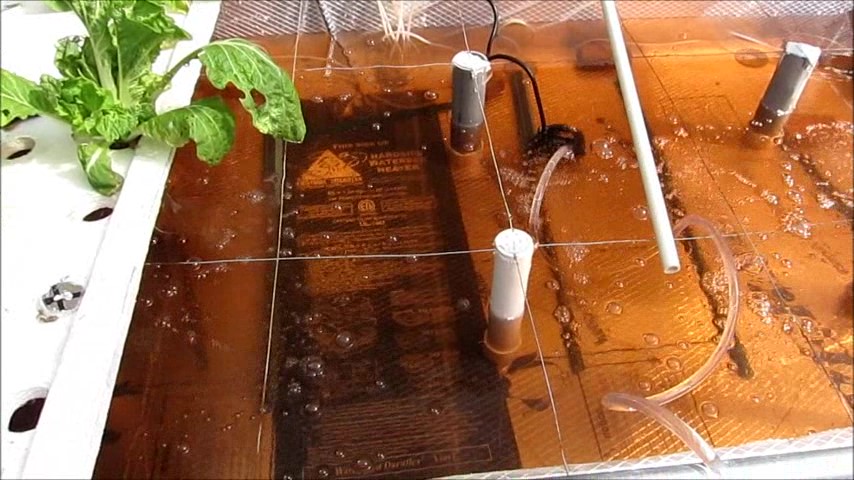
Note the tank heater in the photo above (discontinued in the ‘gen-2’ design).
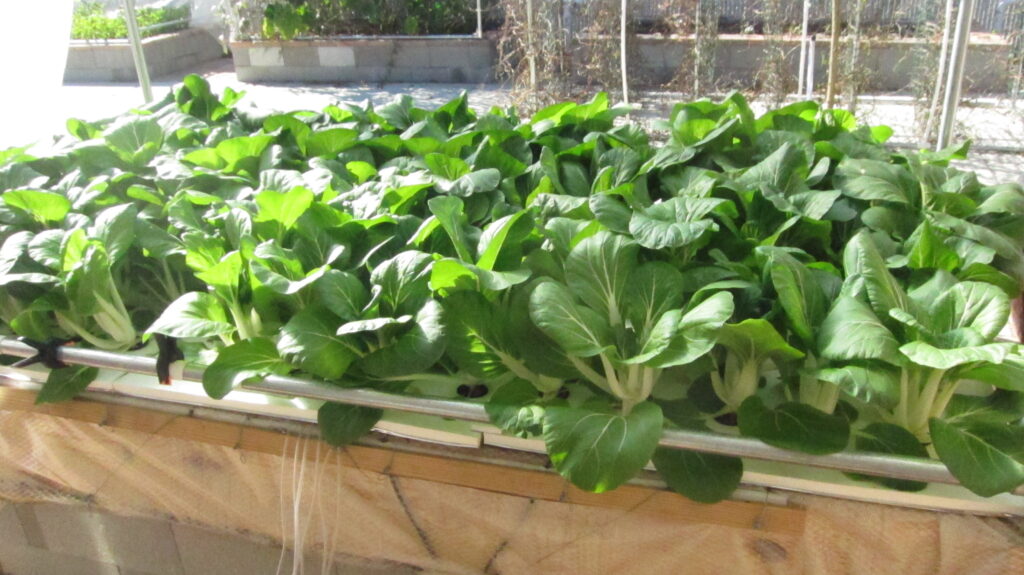
Harvesting Hydro Tank #1 Day 33 101115
.
The Bok Choi in Hydro Tank #1 is ready for harvest after a 33-day growing cycle.
.
.
.
.
Building Hydro Tank #2
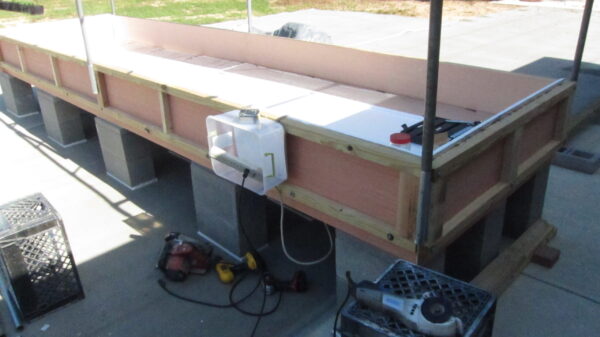
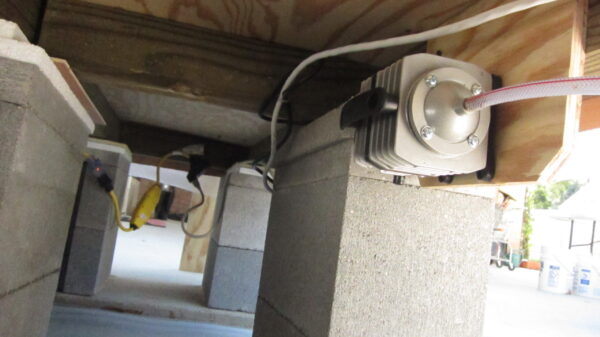
The gen-2 design above features a 4’x16′ size, lightweight walls, updated raft supports, and a rain cover fashioned from Billboard Vinyls.
A single air pump is installed beneath each tank (above right). An electric timer controls the aeration cycle. Note the Styrofoam shims used for levelling the tank.
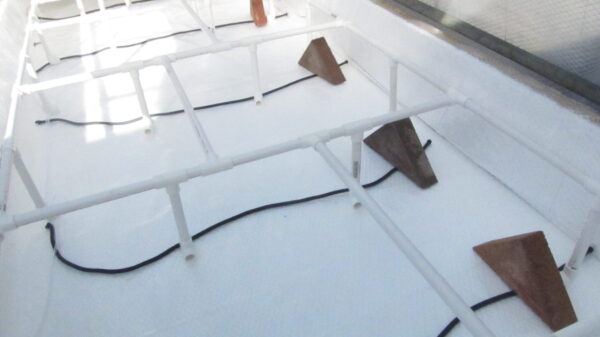
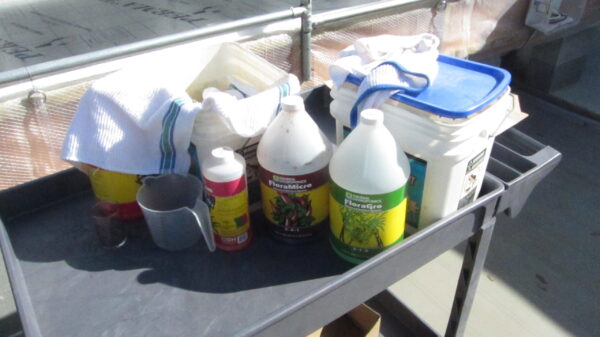
The gen-2 raft support is constructed from 1/2″ PVC pipe (above left). Six air bubbler hoses (attached to a manifold) provide aeration. Maintaining the correct pH and nutritional balance is a daily chore (above right).
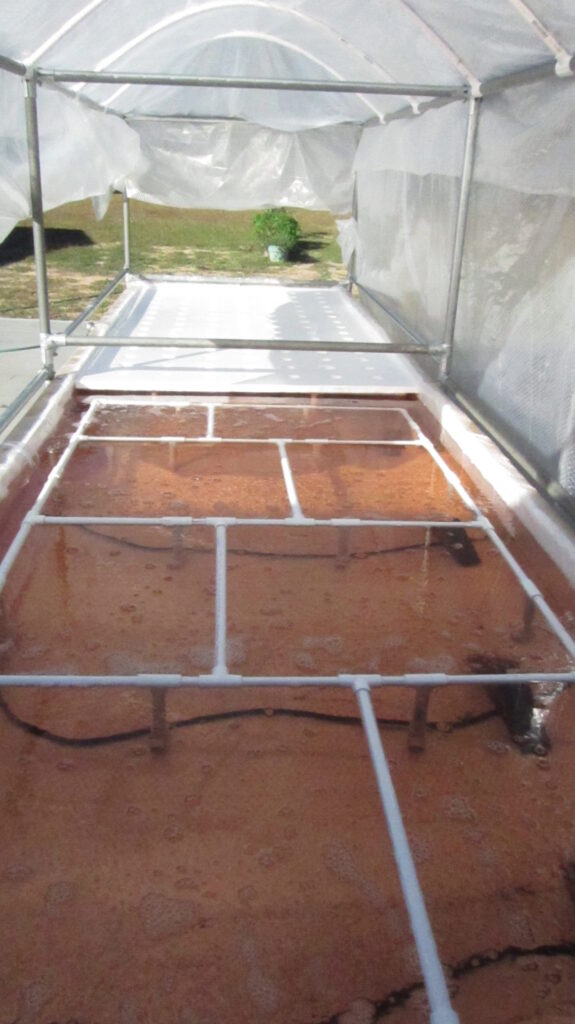
.
This gen-2 tank (left) is ready for planting. A frame for the rain cover is constructed of 1″ galvanized pipe (shown above). The crossbar spanning the mid-section of the tank keeps the sidewalls from spreading when the tank is full. The raft supports in this gen-2 design are constructed of 1/2″ PVC pipe.
.
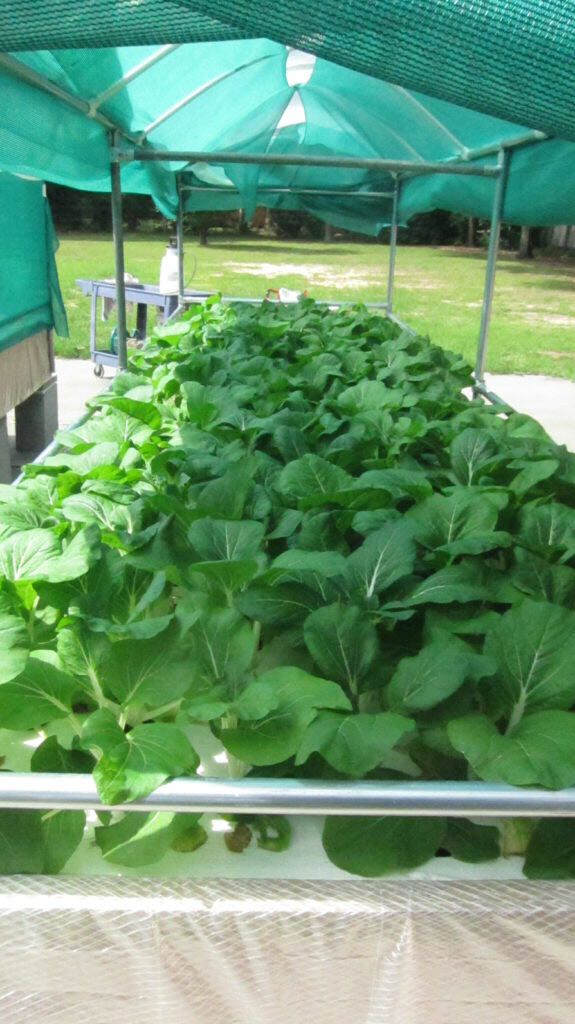
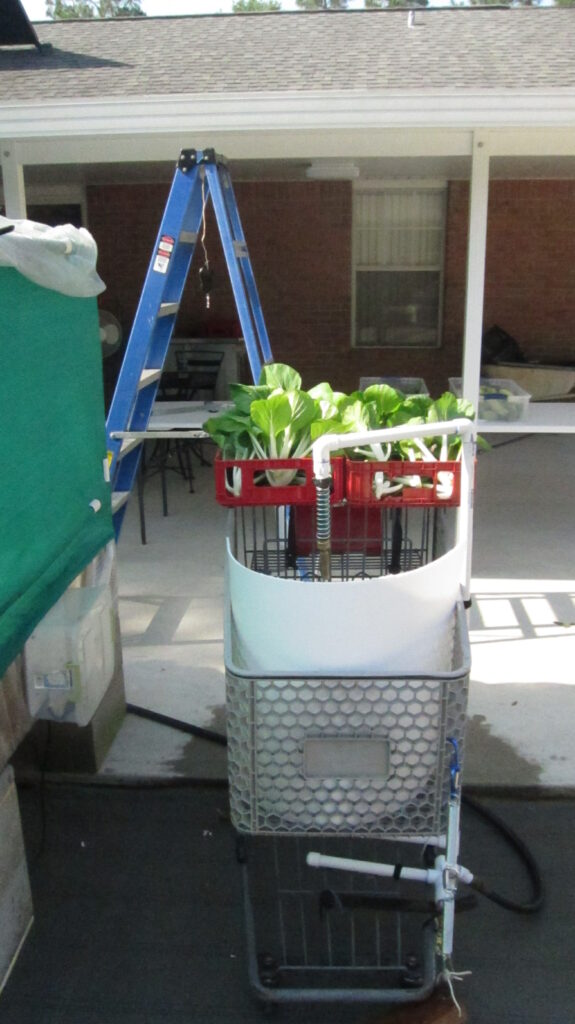
A foot-operated rinsing station, constructed in a re-purposed grocery cart (above right), aids the harvest of the gen-2 tank shown (above left).
.
Building Hydro Tank #3 032316
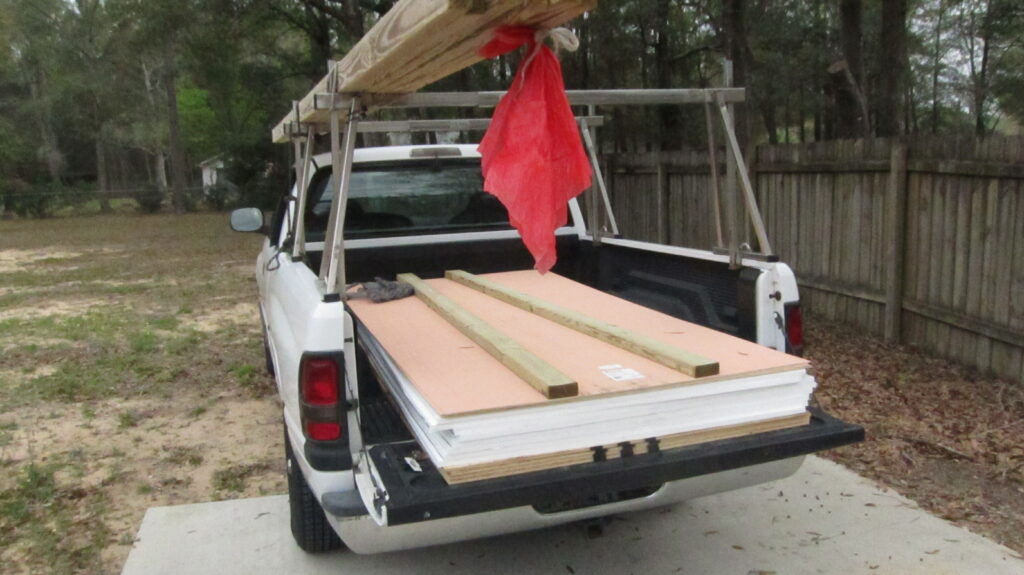
The following images show the construction of Hydro Tank #3. After upgrading our previous designs (now gen-2), and planning the construction, the first step is to purchase materials.
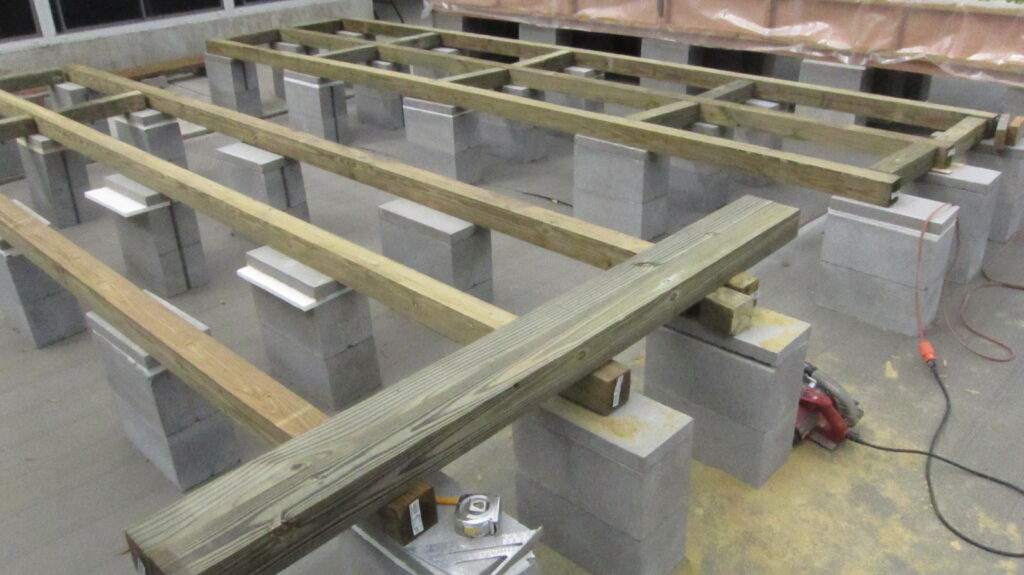
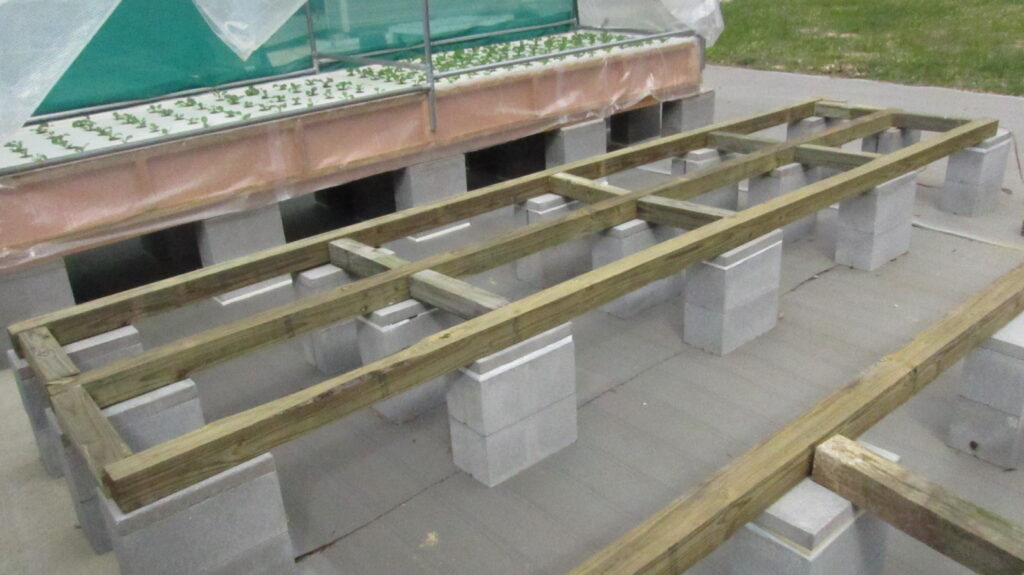
A 4’x16′ Base
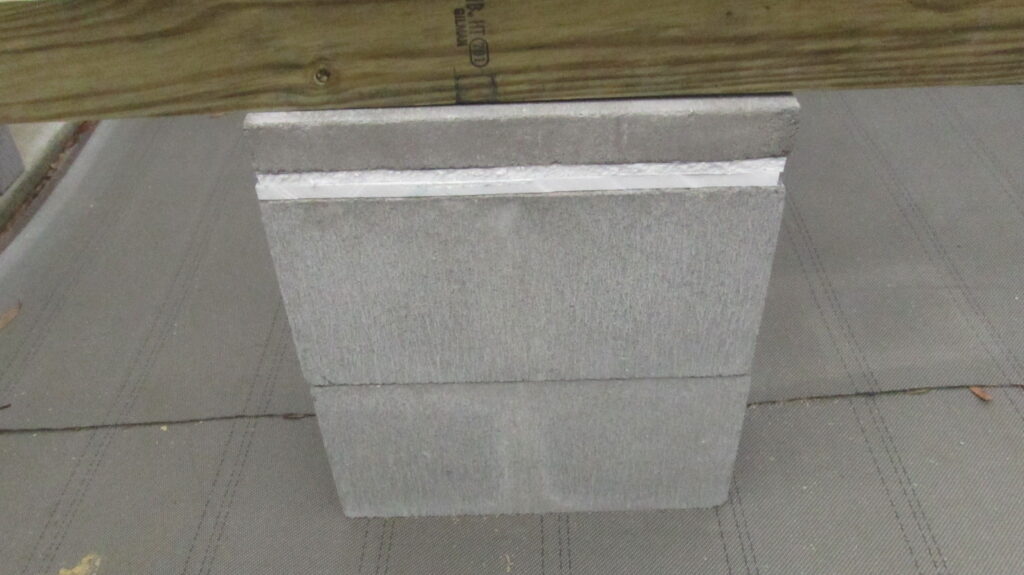
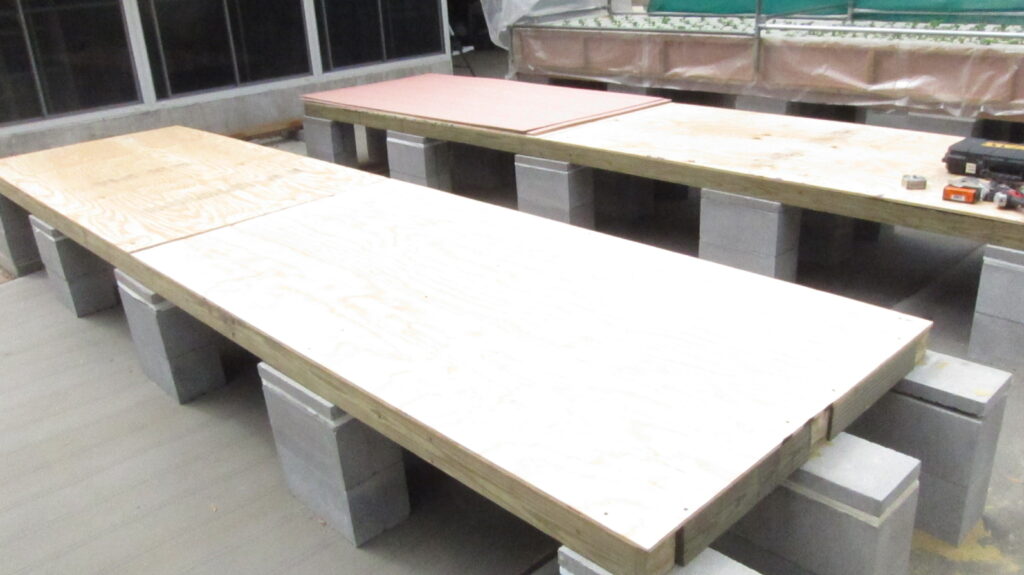
Supported by strategically placed piers (stacked concrete blocks topped by a 2″ cap block) with 4’x4′ pressure-treated crosspieces (above), 3/4″ plywood is used as the floor of the tank (below).
Tip: Styrofoam shims of various thicknesses (cut from sheet stock) are stacked beneath the cap block of each pier to ensure that each pier is level before completing the base.
A Plywood Floor
The 3/4″ plywood sheets (used as the floor of the tank) are screwed to the 4×4 posts, using only enough screws to tie the posts together and maintain stability.
Sidewalls
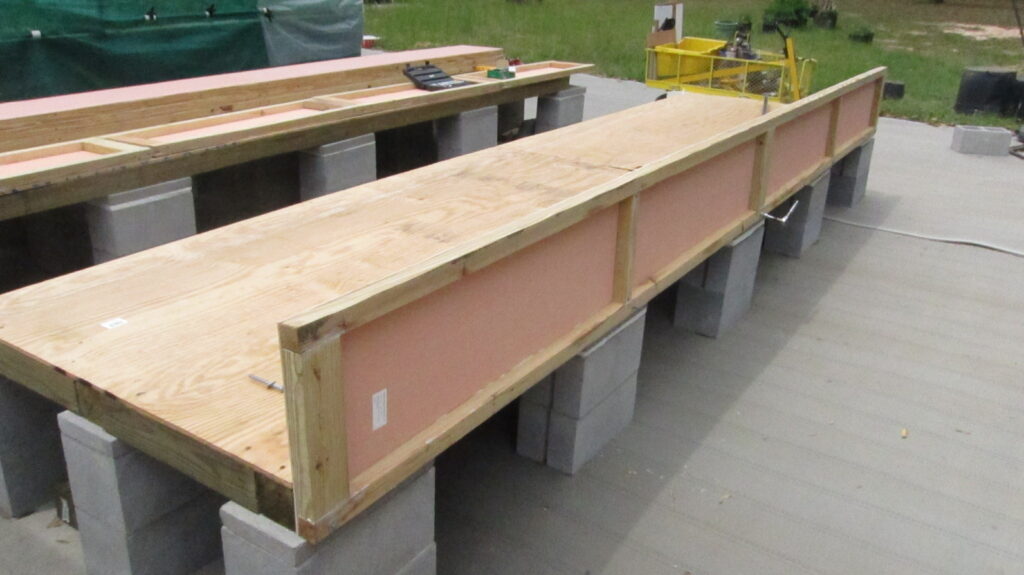
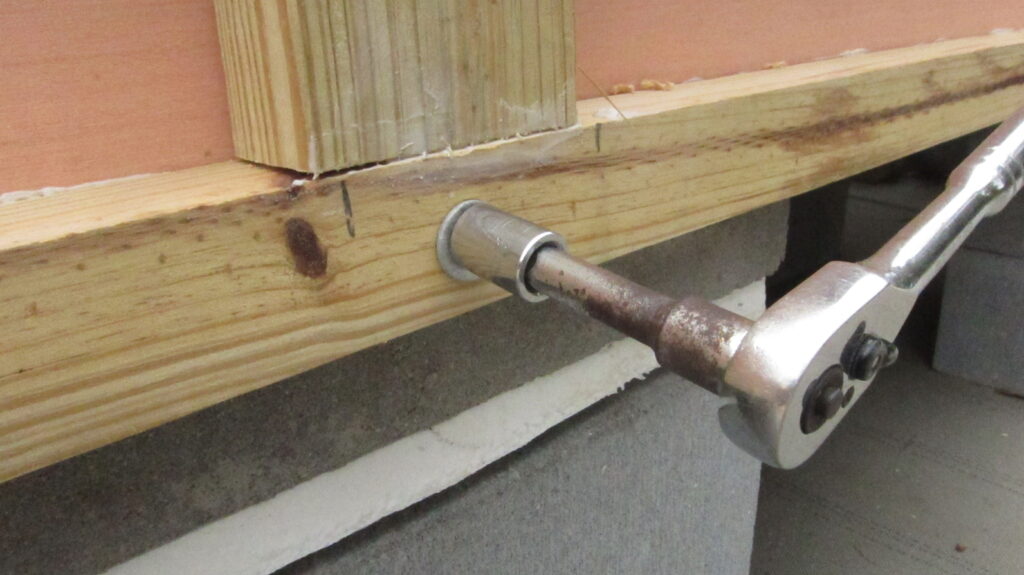
The sidewalls are constructed of 3/16″ luaun plywood (typically used for door skins) screwed and glued to 2″x4″ pressure-treated boards that have been split lengthwise (pre-cut 2″x2″ boards are too weak). 5″ lag bolts fasten the sidewalls to the base (and to each other).
Styrofoam and Plastic Liners
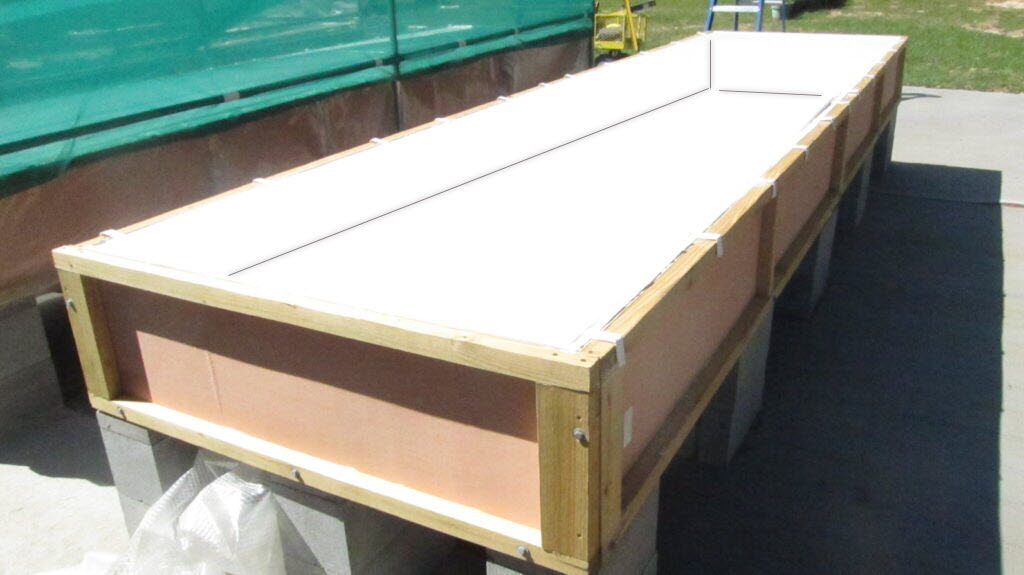
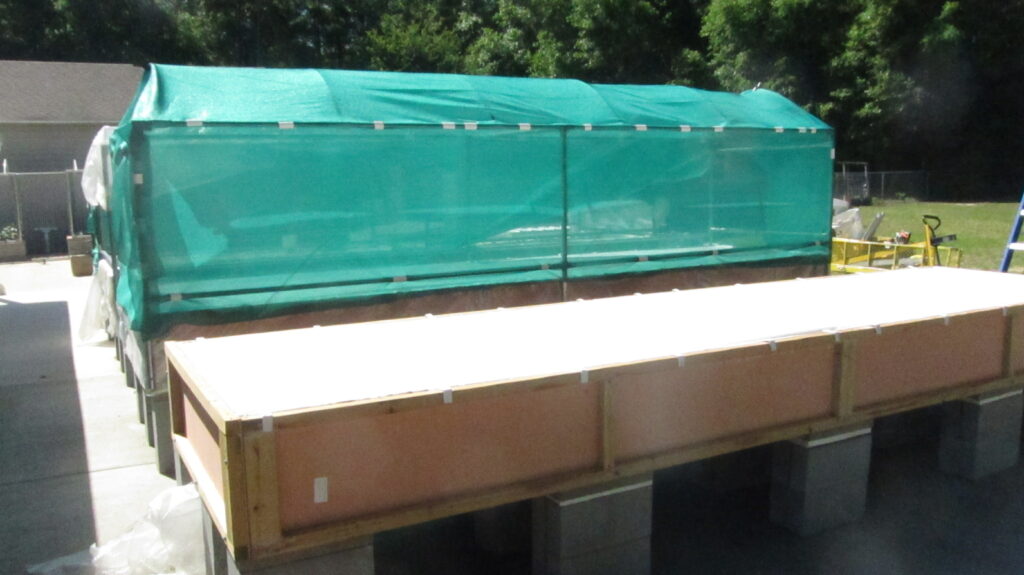
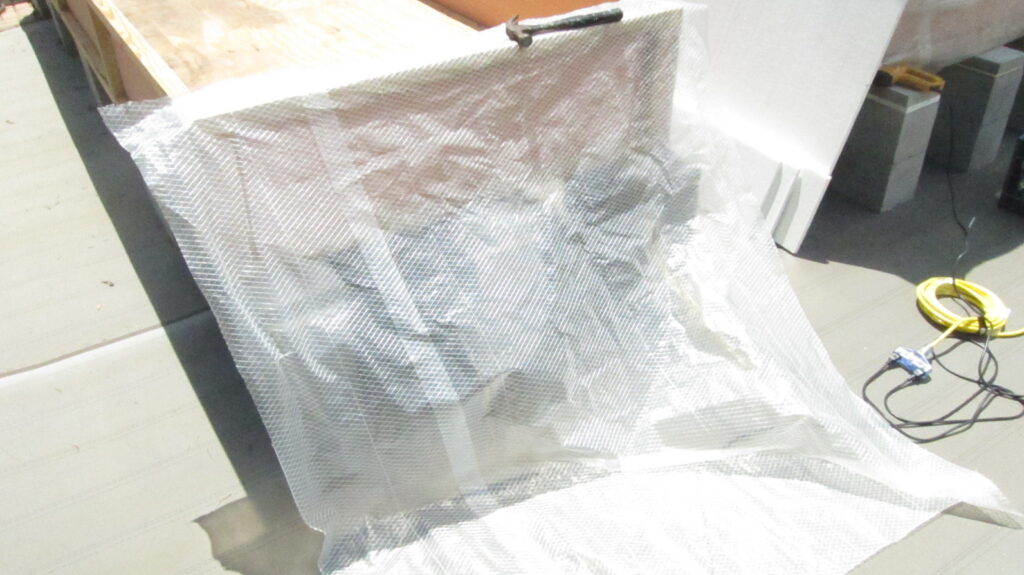
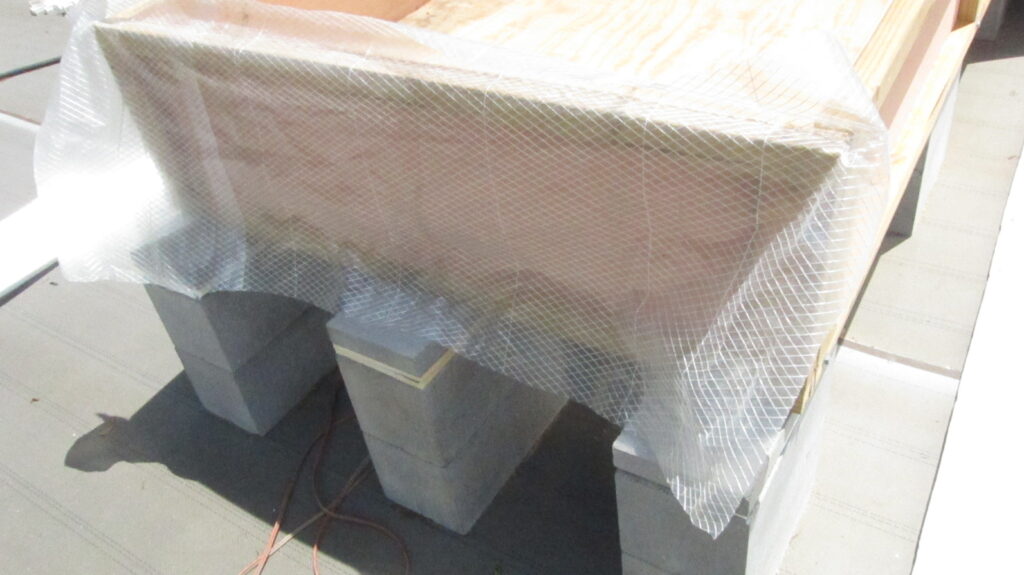
After the sidewalls are installed, the floor and sidewalls are lined with 1/2″ Styrofoam sheets (difficult to see in the images above). Next, an 8’x20′ sheet of string-reinforced plastic sheeting (stapled to the top of the sidewalls) provides a waterproof liner for the tank.
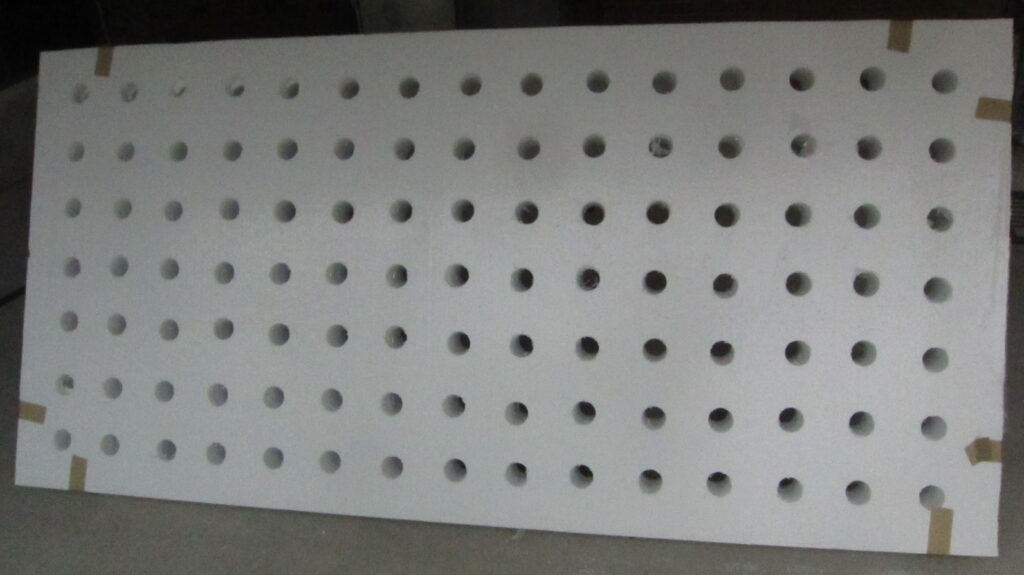
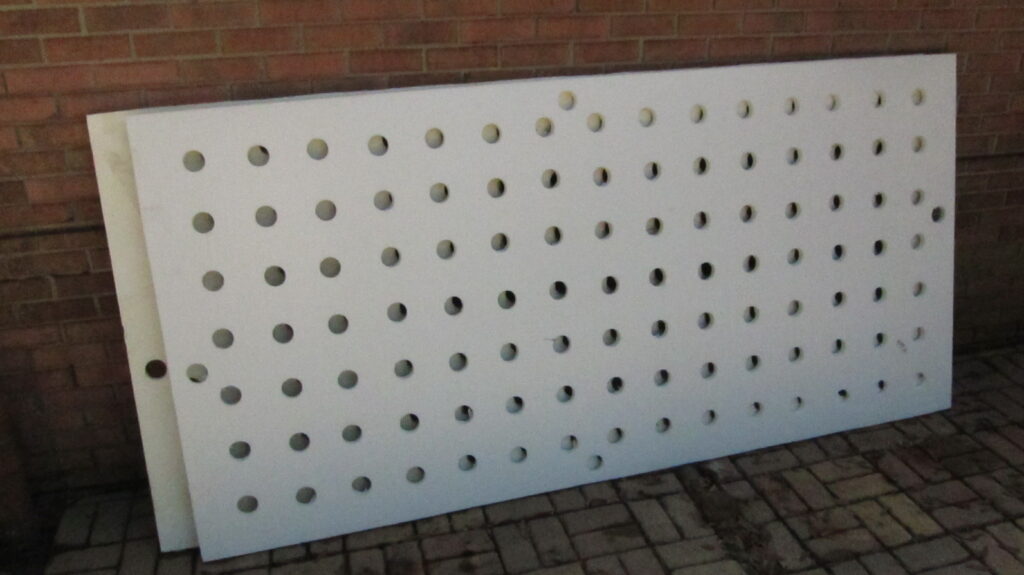
A raft is shown above. Two rafts are needed for each gen-2 tank.
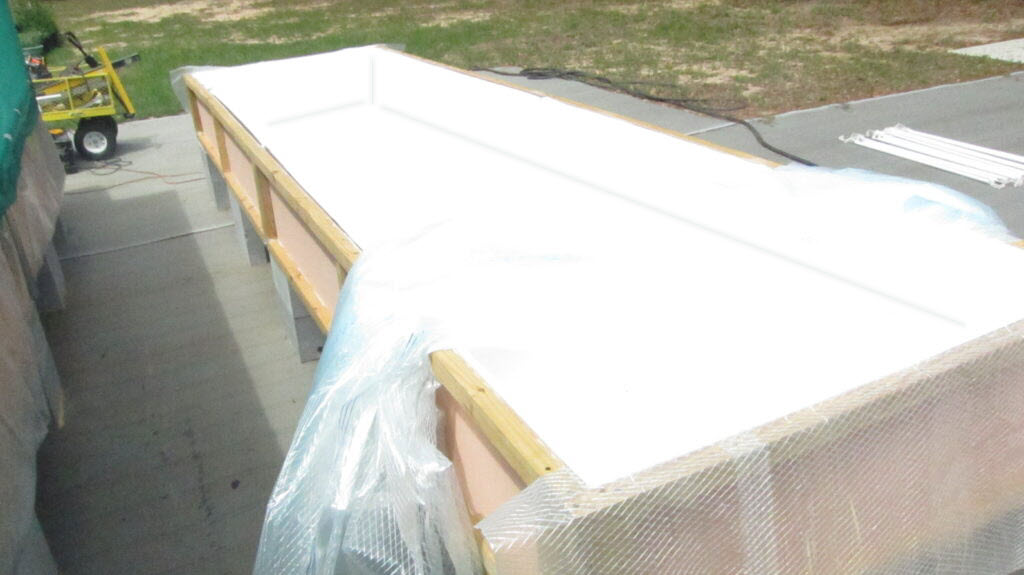
Featuring a lightweight gen-2 design, this 4’x16’x18″ tank can grow up to 110 plants in 2″ pots (before thinning).
New Tank Hydro Drain Pump 090816
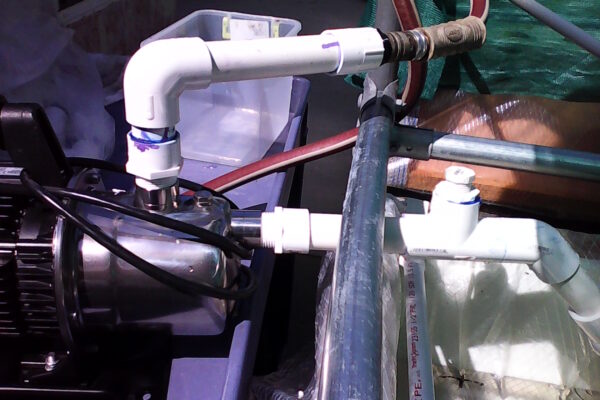
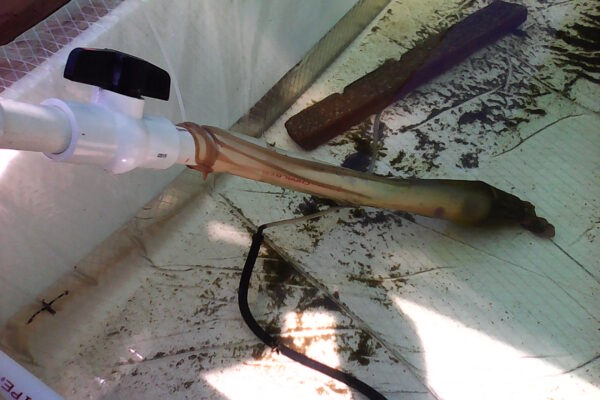
Draining 200 gallons quickly takes a good-sized pump, specially outfitted (above) to do the job quickly.
Cycling Hydro Tank #3 092516
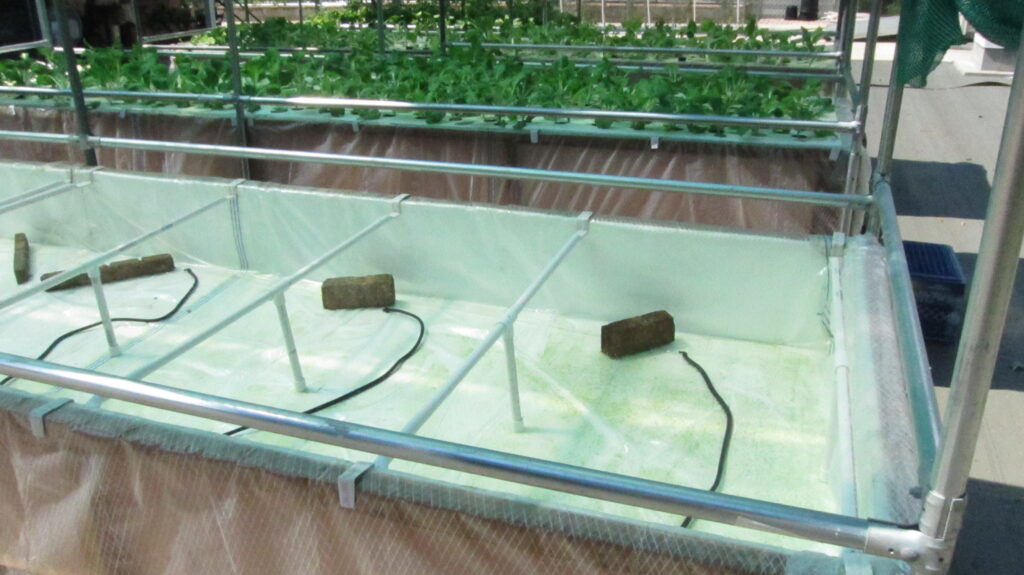
Tank-3 has been emptied and cleaned in preparation for planting the next crop. Note the 4′ aeration hoses weighted down with bricks to keep them submerged. Note also the gen-3 raft supports that slide along the top side rails of the tank.
.
.
.
Tank-4 Rafts 092516
Dry Mixing Hydroponic Nutrients 120716
Our quest to replace high-priced liquid nutrients for our hydroponics tanks took a major step forward thanks to Mr. Rick Wells of Pensacola Permaculture, and Mr. D. Cavage—a highly experienced hydro-gardener.
Mr. Cavage provided the information needed to mix our own nutrients using readily available components. This change will allow us to reduce our (nutrient) cost-per-plant by up to 75%. Testing is underway. Stay tuned.
New Ridge Pole for Tank #1 060117
A hard rain on a hot summer day can be a welcome break in the weather. Unfortunately, this event often caused the PVC supports of our hydrotank rain covers to collapse. This problem has been solved by installing a steel ridge pipe to support the PVC bows.
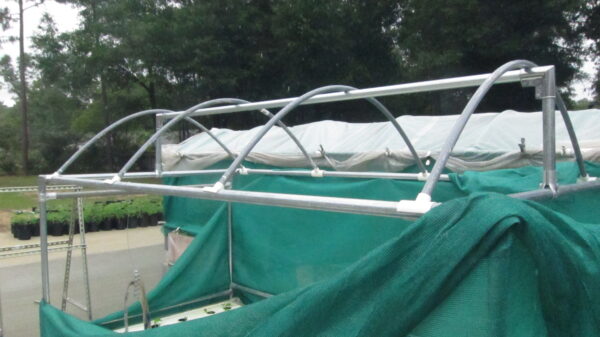
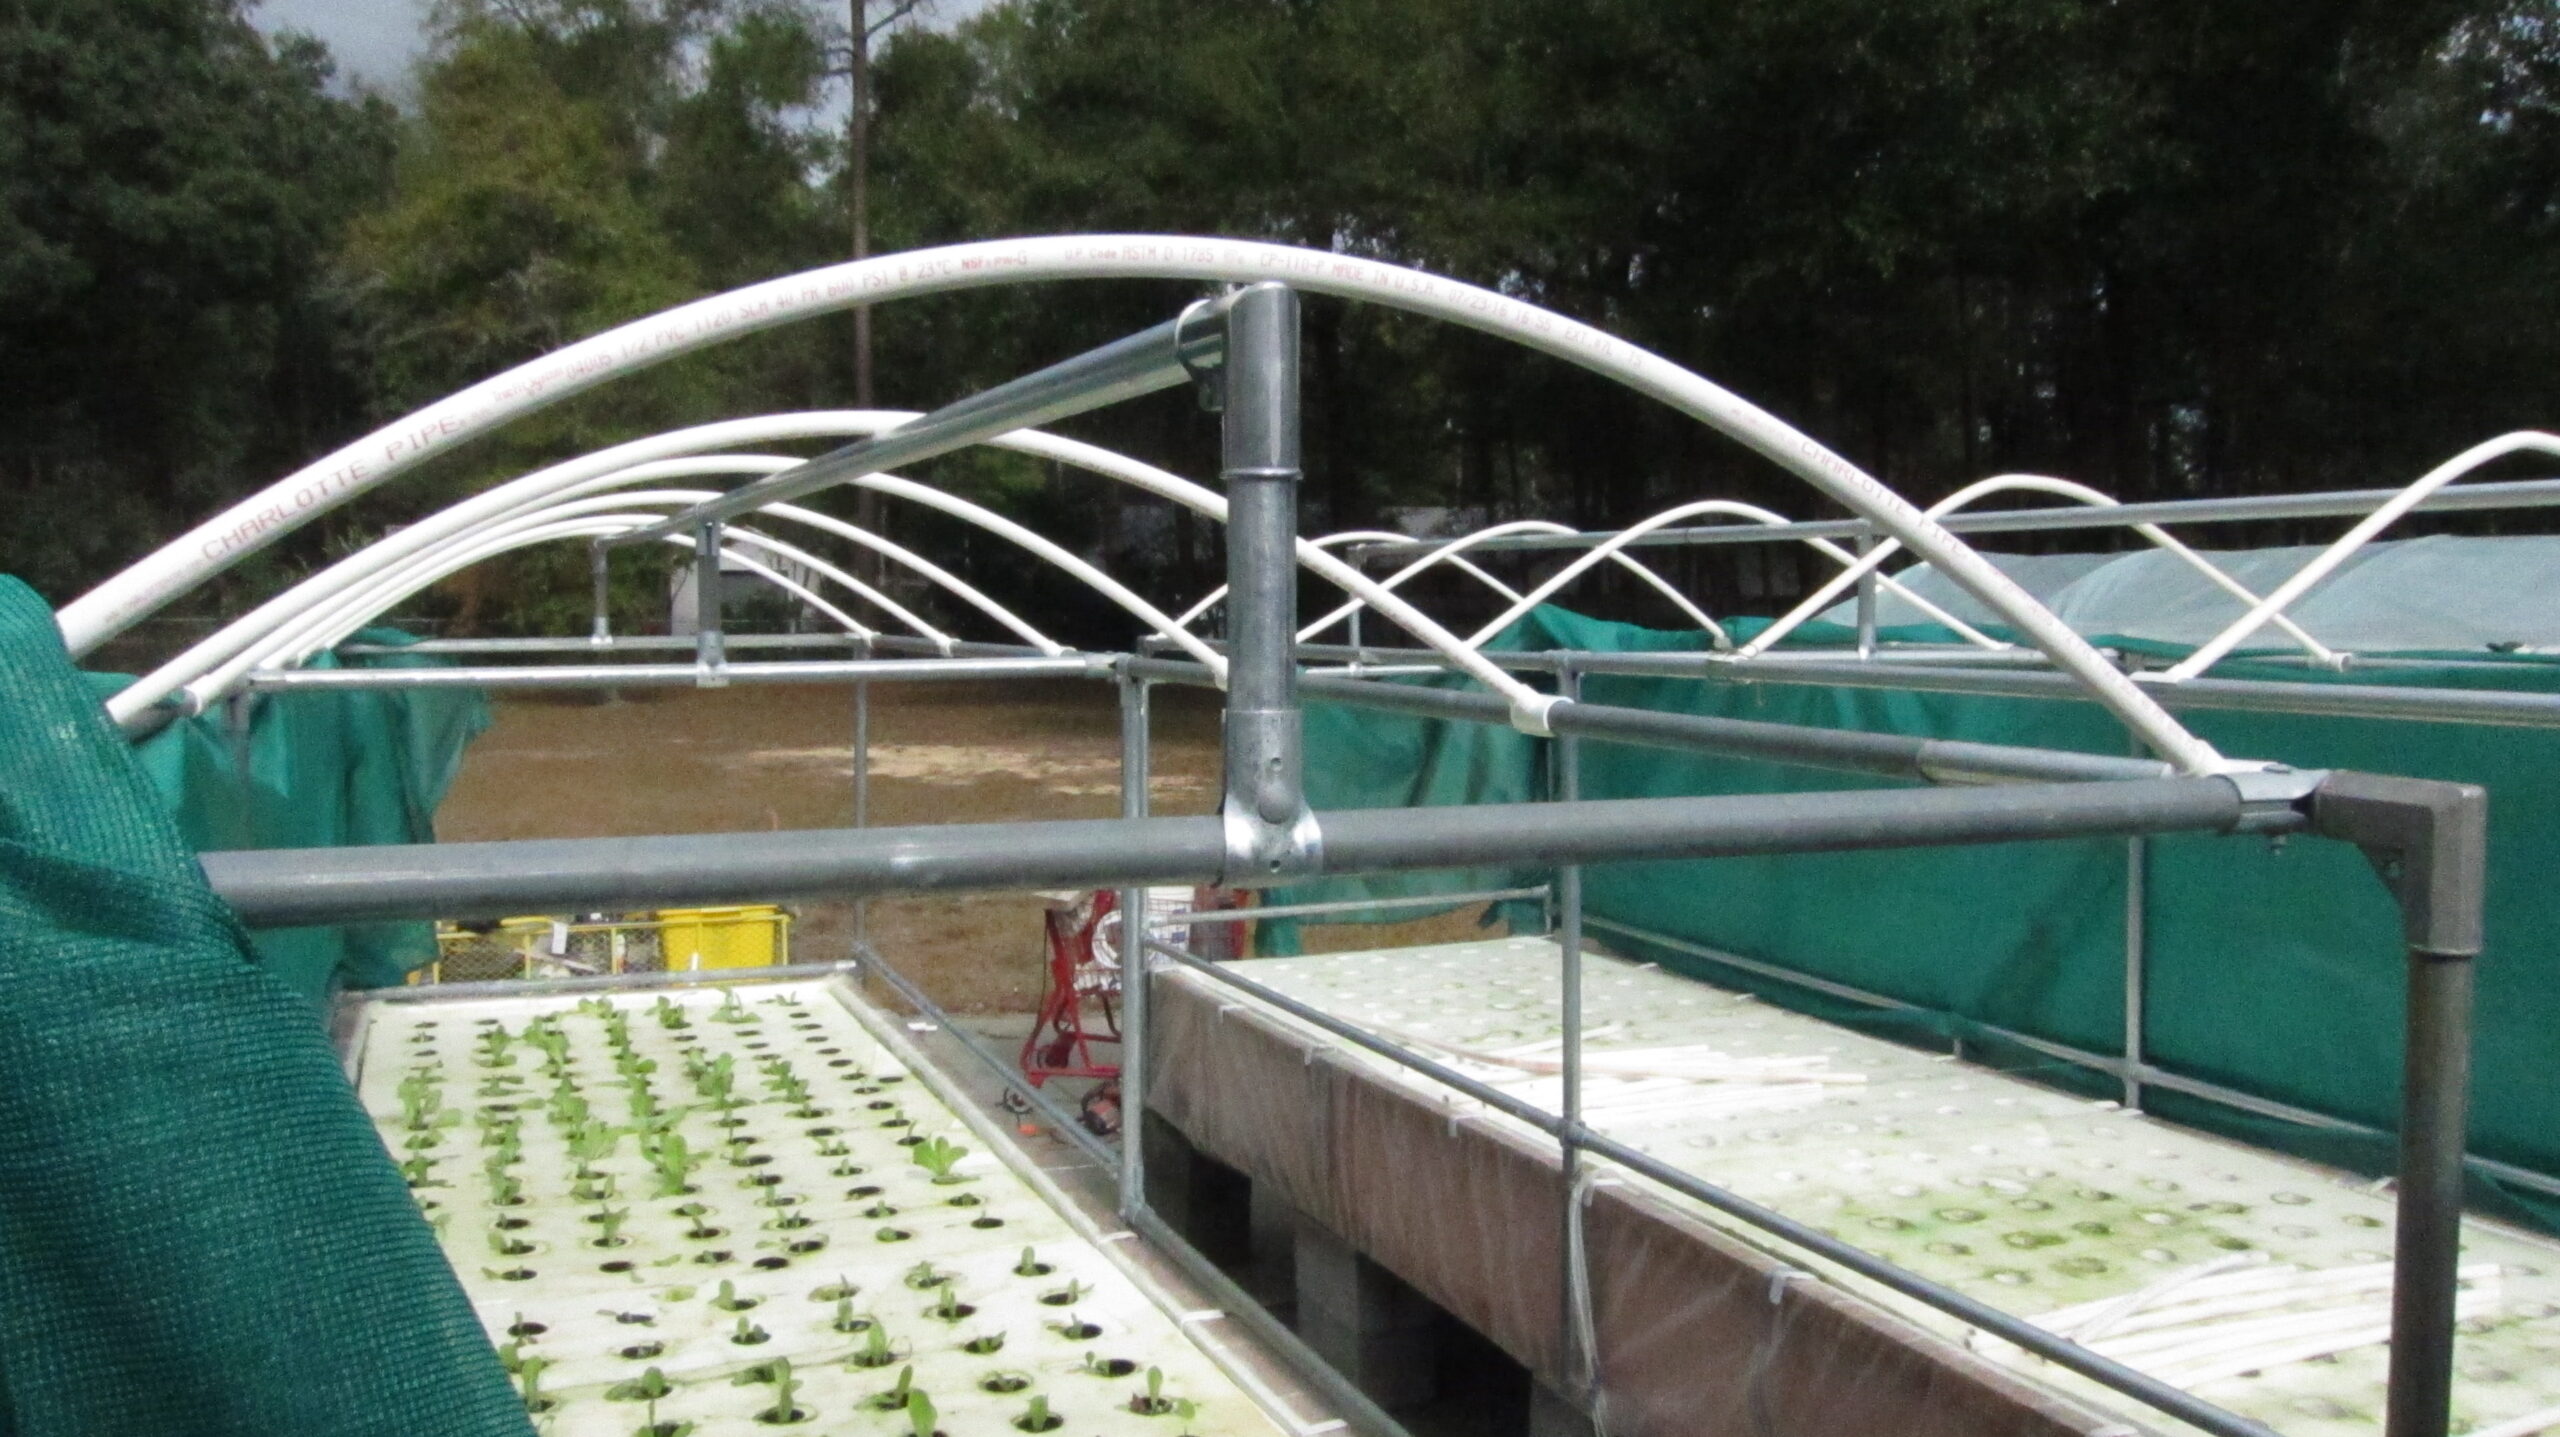
These images (above) show the new steel ridge pole we added to Hydro Tank #1, our oldest gen-1 tank. This 4’x8′ tank was constructed with heavy 2″x12″ side boards. Its capacity is 220 gallons. For gen-2, we switched to much lighter materials, constructing the side boards out of lightweight 3/16″ luan siding panels reinforced with 2″x2″ rails. Our gen-1 rain covers were made of string reinforced plastic sheeting (shown in the background above), which only lasts about a year, and lets in too much heat. Our gen-2 rain covers are made of re-used billboard vinyl, which lasts up to 4 years in the hot sun. Note the green sun screen material that protects the young plants from direct sun.
Hydro Tank Cover & Liner Change

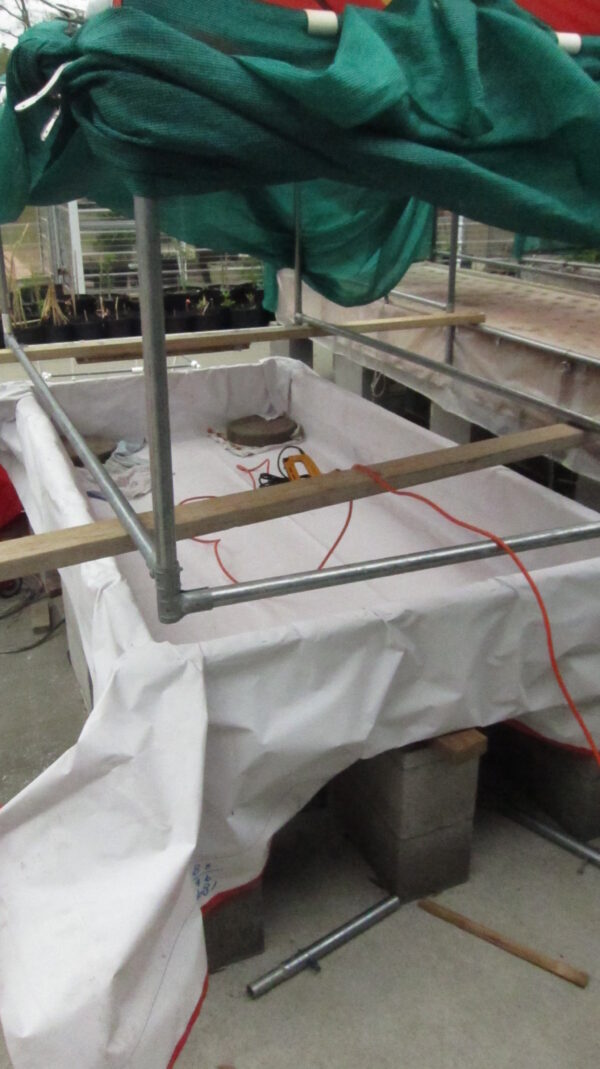
To aid removal for tank maintenance, the steel rain cover frames of the hydroponics beds are fitted over short, tapered posts that are bolted to the frame of the tank itself (above left). Constructed of the same galvanized pipe that is used for chain-link fences, this socket-and post design on our gen-2 tanks proved very effective. Note that there is no need to move the cover frame away from the tank when replacing the tank liner. It is merely lifted and supported by 2×4 boards (see image above right) to provide the room needed to replace the tank liner.
After three years of outstanding service, sun damage (around the rim and outer skirt) made it necessary to replace the hydro tank liners. Originally lined with a continuous sheet of string-reinforced plastic, we switched to an outer liner made from Billboard Vinyls instead (middle image above).
Cut from inexpensive 14’x48′ sheets of recycled vinyl (from Bilboard Vinyls) the new liners are laid carefully into the tanks, the corners gathered and pleated, and draped over the top tank rim, where they are stapled into place. A length of quarter-round molding is nailed around the top rim of the tank to protect against abrasion from our new rim-mounted raft supports. Although sun-resistant, these vinyls are not waterproof. We tried painting them with a heavy coating of Flex-Seal but that attempt proved disastrous! The Flex-Seal leaked, and it took several days to dismantle the tank to let it dry. To solve the problem, we added an inner liner of string-reinforced plastic sheeting. The combination of the two liners worked out nicely and we relined the other tanks in the same manner.
The new lining is laid carefully into the tank (above), the corners gathered and pleated, and then draped over the top rim to provide a skirt that protects the outside wooden walls of the tank from the damaging effects of the sun.
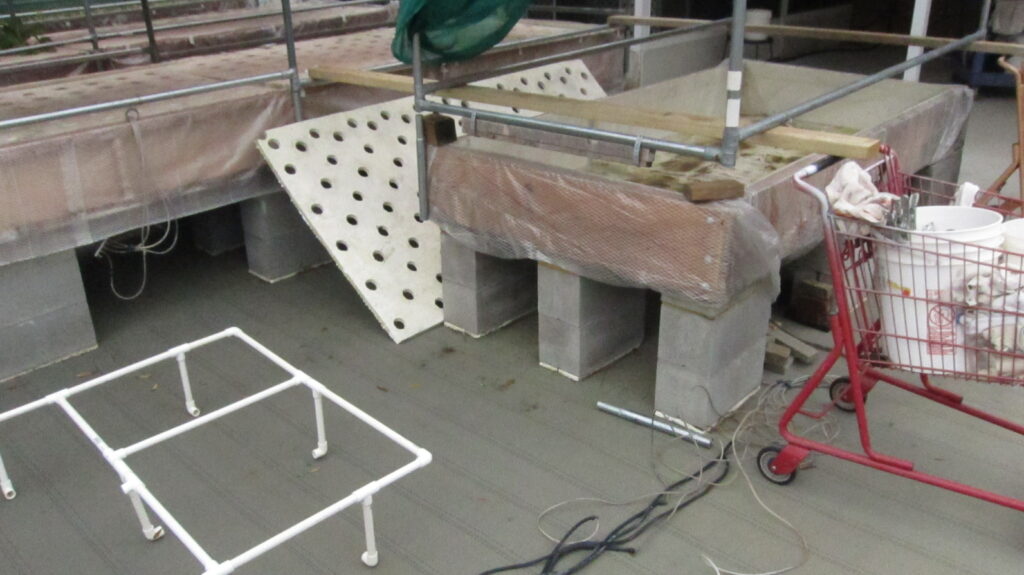
With rafts, raft support frame, and air hoses removed for liner replacement, our first (‘gen-1’) tank is shown above (and in the images below). The gen-2 raft support frame shown above (constructed of half-inch PVC pipe) was later simplified to create a gen-3 version that slides along the top rim of the tank.
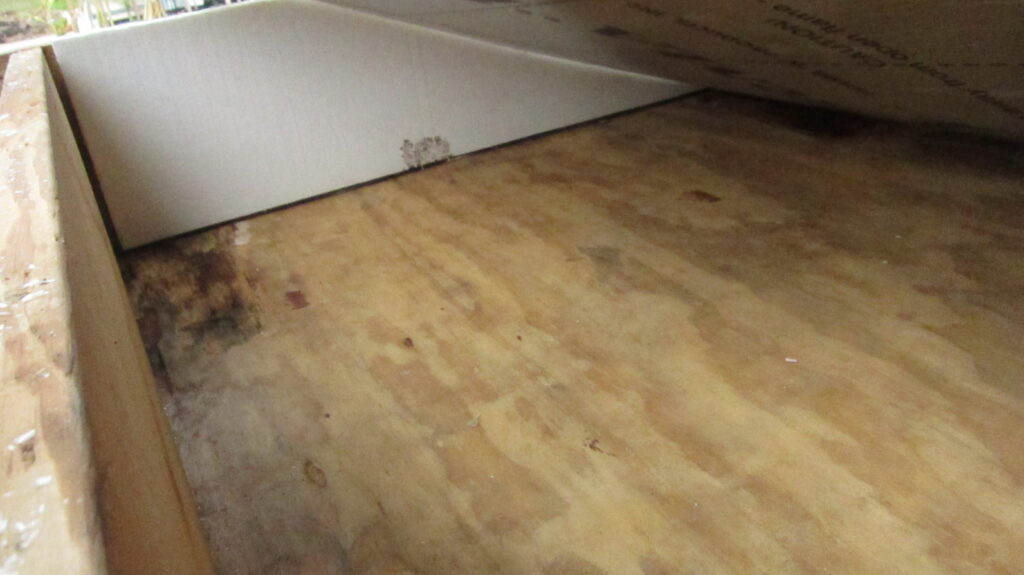
Beneath the vinyl and plastic liners is a half-inch sheet of Styrofoam, cut to fit the floor and walls (one wall is shown above).
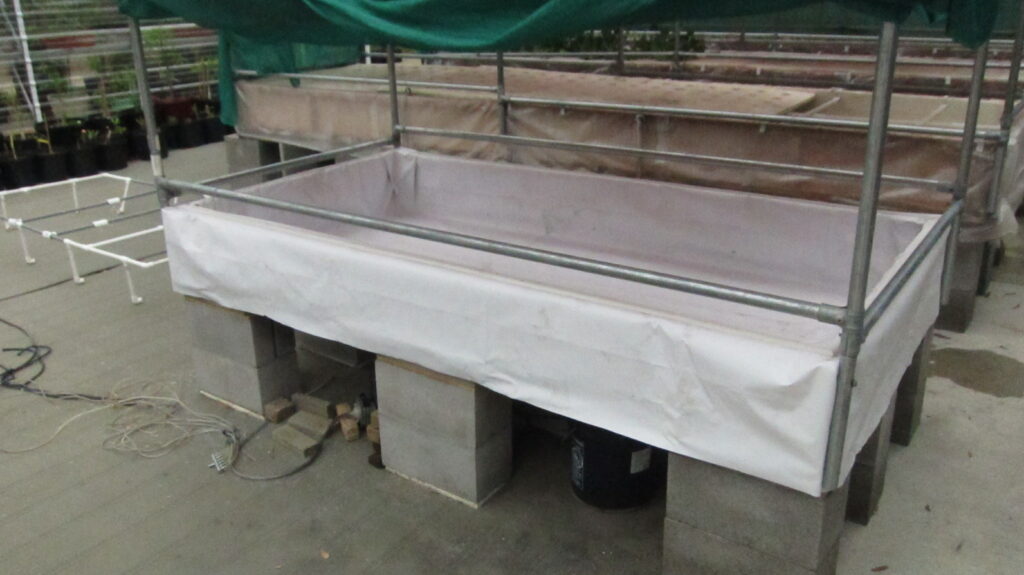
The new liners have been installed and the cover frame refitted on our gen-1 tank (above). New liners have not yet been installed in the larger gen-2 tanks shown in the background of the image above.
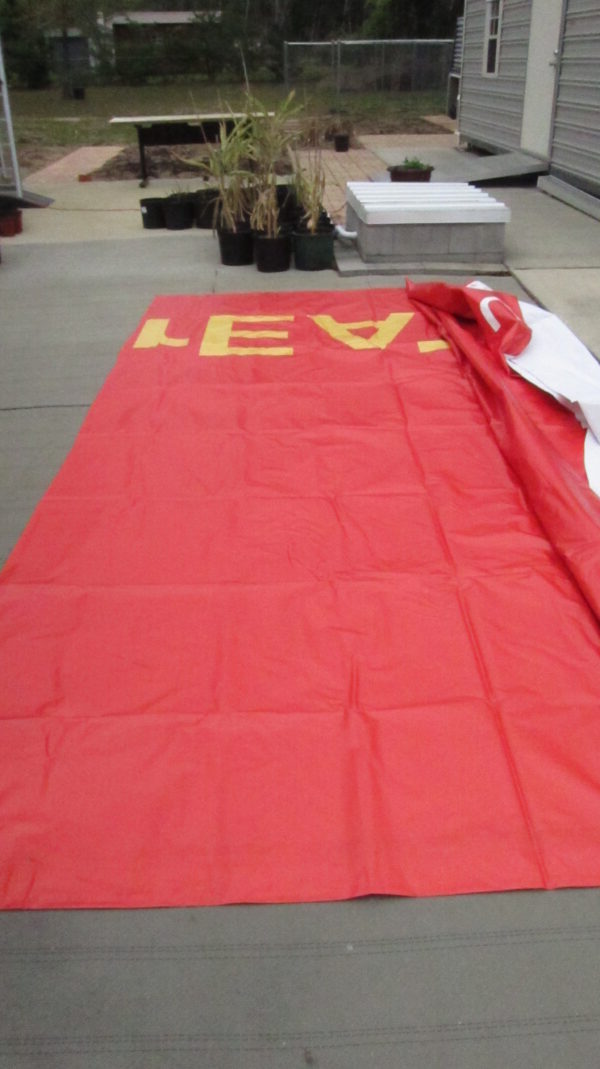
New Billboard Vinyl Rain Covers
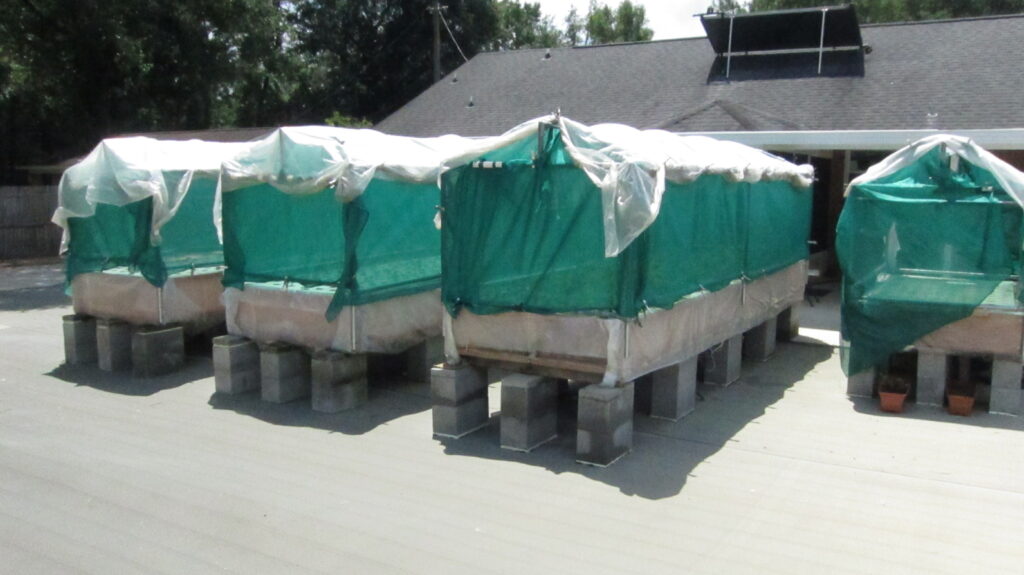
Shown here after several years of operation, all four tanks are equipped with string-reinforced rain covers. The small tank on the right is a gen-1 tank (constructed from our original design). The other three are gen-2 tanks (lightweight and more efficient).
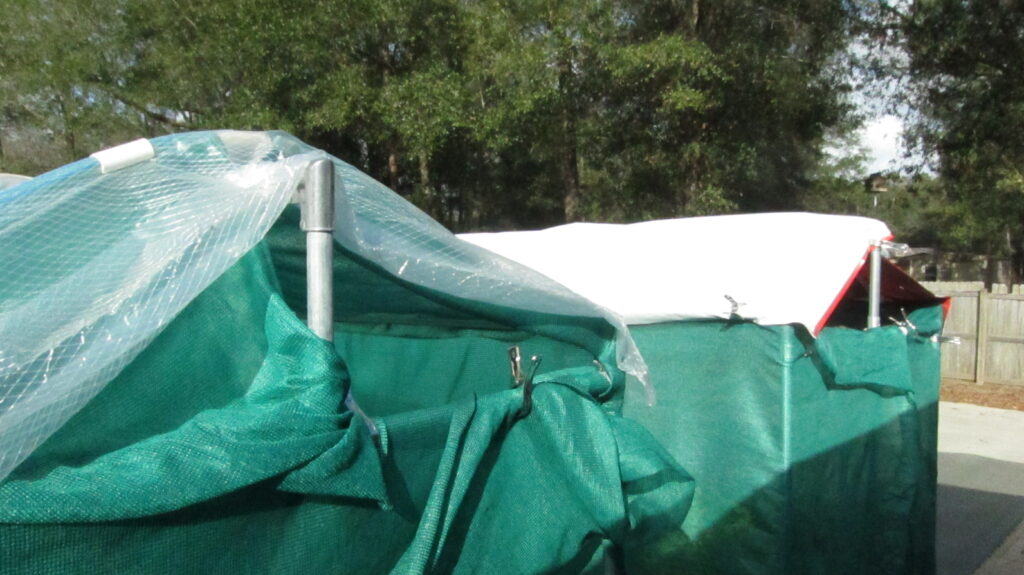
The tank on the left (above) shows green sunscreen fabric under a cover made from string-reinforced plastic. This plastic degrades after two years of exposure to the sun. The tank on the right has a new cover made from Billboard Vinyls. No sunscreen fabric is needed. This solution lasts about five years. In addition to eliminating the need for sunscreen fabric, the new solution doesn’t cave in during a heavy rainstorm (a cave-in can swamp the tank).
